Class 12: December 2nd

Project work session

  • Sketching, ideation, and discussion.
  • I'll be talking with everyone to get a sense of what you're interested in pursuing over the next two weeks.
  • Printing!

Work on project documentation

All documentation is due by the start of next class.

GitHub documentation

  • A source folder (named src or source) which contains your source files.
  • An export folder (named dist, stl, or exported) which contains your repaired .stl files.
  • An images folder (named img or images) which contains one edited image of your printed objects.
  • A file named README.md which describes the assignment or objects.
  • An open source license of your choice (Probably MIT or GPL, but refer to choosealicense.com for assistance.)
  • A brief (roughly 200 word) pdf describing your project (goals, choices made, outcome, etc.)

Documentation

  • 1 high quality, edited image (minimum) of the connected forms plus an additional image of each individual form. Neutral backdrop.
  • 1 brief, edited video* of your work if there is an interactive component. 1-3 minutes. No music please.
  • (* A series of 5-6 high quality, edited photographs documenting the interaction can be substituted for a video)

Homework

Complete project documentation

See details above.

Begin research project

Projects are due on December 16th, so get some work done!

Class 11: November 25th

Project presentations

Today, we'll take a look at the collective fruits of our labor. Let's focus on providing thoughtful and constructive feedback for everyone. I would like for this discussion to be led by you not me.

A little structure...

For each group: First, we (the audience) provide feedback or ask questions based on observation. Then, you (the presenters) can talk a bit about what you were trying to accomplish. Finally, back and forth between all of us.

Becky Stern

Becky's talk will be from 12-1pm in Leake Hall Auditorium. Where's that?

Attendance is mandatory

Early or late lunch?

Due to the scheduled time of the talk, we'll need to break for lunch eaither earlier or later than usual. Which would you prefer?

The end is near

The remainder of the semester is for you to realize one small, personally driven research project. This can include anything related to, or incorporating, 3D printing.

  • Work presentations will be on the last day of class (Dec. 16th)
  • Documentation and source code pushed to GitHub no later than Dec. 20th.

Homework

Thanksgiving!

Enjoy your short break. See you next Monday!

Research research

Start thinking about what you'd like to do for the rest of the semester.

Class 10: November 18th

Work session

Project 2 is due at the beginning of class next week. Get some work done!

  • Printers are available on a first-come-first-serve basis.
  • Remember, only printers with .5 nozzles can be used with LaySTUFF. This is currently dFab Mendel and BLUE i3. (These printers may also be used for other materials, if necessary.)
  • I will meet with everyone to discuss project plans.
  • Take breaks/lunch when you need them. (Make sure someon is monitoring your prints before leaving).

Homework

Complete Project 2

  • Complete project.
  • Be aware of the impact of the new lab rules on access and workflow this week..
  • Becky Stern will be participating in some of the project discussions next week. Please familiarize yourself with Adafruit and Sternlab.

Class 9: November 11th

That Mavericks "feature"

If you have upgraded to Mavericks, you've probably been enjoying the extended battery life. However, if you've also been printing, you probably haven't enjoyed the impact the upgrade has had on using Printrun in the background. To fix the issue, find Printrun in your Applications folder, choose Get Info by right clicking on its icon, and check Prevent App Nap.

Restart the app, if necessary.

Windows users... victory pose!

Printable tool research show and tell

Let's take a look at everyone's tool and hear about their experiences with it.

Please email me the brief writeup and images documenting your experience before leaving today.

New materials

We have some new printable materials to experiment with in class:

  • Glow in the dark PLA (Normal PLA settings)
  • Thermochromic PLA (Turns yellow when temperature exceeds 91.4º F, Normal PLA settings)
  • Soft PLA (Extruder: 200-230º [make sure no fan is on at lower temp], Bed: No heat needed) More info...
  • Laywoo-D3 aka "wood filament" (Extruder: 175-250º [higher temperature results in darker print], Bed: No heat needed, Nozzle: 0.5 and higher) More info...
  • Laybrick aka "stone filament" (Extruder: 165-210º [make sure to use a fan at higher temperatures], Bed: No heat needed, Nozzle: 0.5 and higher) More info...

Reference objects

Print a small object* which can be printed in each of the new materials introduced today.

  • *Multiple objects will be fine if you feel like experimenting with different kinds of forms (solid vs. hollow, for example) or characteristics of a printing material.
  • Maximum of 25mm in largest direction, unless you are planning on printing something quite skinny (10mm or less) and need extra length.
  • Remember, round things are measured in OpenSCAD by radius, so the maximum would be 12.5mm.
  • Be sure to make notes on your printer settings.

Disabling the fan but keeping the layers cool

The Slic3r profiles are set up to automatically turn on the fan. While this is great for PLA, it's not so good for higher temp materials (ABS, soft PLA). To stop the fan (without modifying the custom gcode for the printer):

  • Filament Settings > Cooling > uncheck Keep Fan Always On
  • Do not uncheck Enable auto cooling. This will automatically slow down your print to cool as needed. Trust me, it is needed.
  • Stop the fan by entering a M107 command in Printrun when your print begins.
  • Enter another M107 when your bottom shell finishes (you should notice a change in speed when it begins infill).

Adding buttons to Printrun

Let's face it, entering M107 manually kind of stinks, so let's create a button which we can press to kill the fan.

  • Underneath the layer preview window you will see a little button with either a . or a + on it (apparently, it may also be blank). Click it.
  • Title your button FAN OFF
  • Add the M107 command to the Command field
  • Ignore color, unless you are on Windows.
  • To add a "fan on" button, use the command M106 S255.

Project 2: Highly Functional (Due Nov. 25th)

Thomas Thwaite's toaster

This project can be completed with a partner or by yourself. See details of partner version below.

Create an object which serves a specific function in your life. The object must be composed of two different printed materials, but supplemental non-printed materials may also be used.

Some things to consider:

  • How does your object differ from pre-existing/manufactured objects which have related functionality?
  • Which materials should be used to make this object? How do the specific properties lend themselves to their use.
  • While the object must be functional, it does not need to be practical (It must work, but its design can be informed by other issues related to its use.)

Partner version

Create a parametric version of the functional object. The parameters (minimum of two) should have a clear, intentional impact on the object's use.

Two different printed versions must be presented in class.

Schedule:

  • Nov. 11th: Begin ideation. Material testing.
  • Nov. 18th: Work session. Discuss project plans.
  • Nov. 25th: Project presentations. Becky Stern talk and class visit.
  • Dec. 9th: Project documentation due. All code licensed and pushed to GitHub.
Homework

Work on Project 2

  • Have a goal which you can discuss with me.
  • Know what materials you want to print with.
  • Have something printable.

Class 8: November 4th

Short leash...

Until further notice, regarding the printers in the dFab lab:

  • You must print using your own computer, not the dFab Linux machine.
  • No leaving your prints unattended. If you must leave for an extended period, you must have someone monitoring your print.
  • No overnight printing without Andy or Ryan's permission. No other tech may substitute.
  • Failure to abide by these terms may result in a loss of printing privileges outside of class.

Toolmaking

Unfold & Jonathan Keep

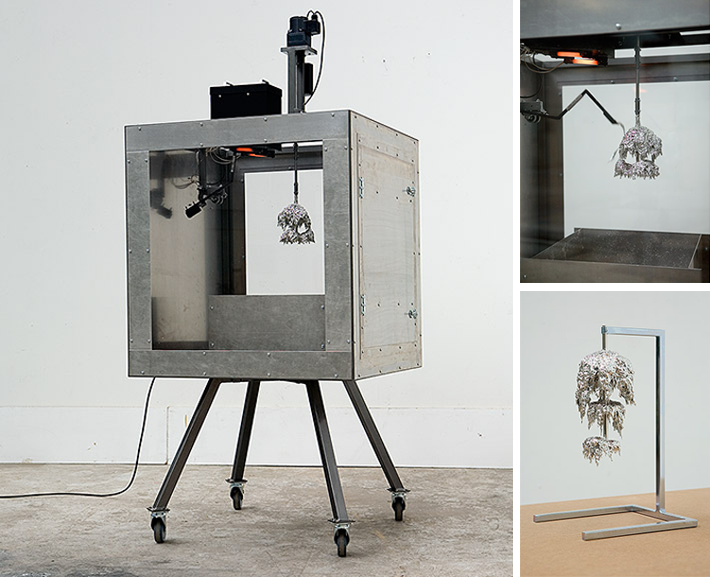
L'Artisan Electroniqueby Unfold with Tim Knapen, 2010

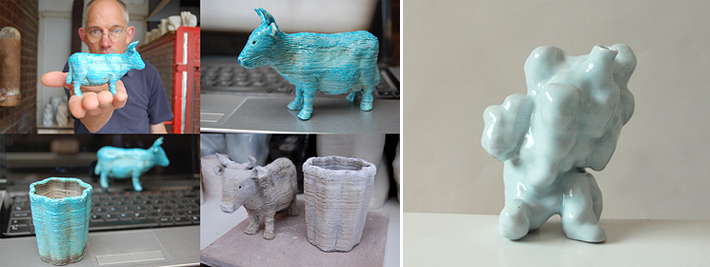
Jonathan Keep's DIY ceramic delta printer

Markus Kayser

Sun Cutter, 2010

Solar Sinter, 2011

Silk Pavillion

Biologically inspired/assisted fabrication from MIT Media Lab's Mediated Matter Group

ABS (Acrylonitrile Butadiene Styrene, not of steel...)

  • Used in everything from car parts to LEGO blocks.
  • Higher extrusion temperature: 225-250º C (230º recommended).
  • Heated bed mandatory: 110º C.
  • Softer than PLA.
  • Creates noxious fumes that can be harmful when printing. Use only in a well ventilated space.
  • Requires very careful surface prep (Kapton tape and ABS "juice" slurry. How to make/use ABS juice.
  • Dissolvable with acetone (can also be used for gluing or smoothing).
  • Do not use a fan when printing! This can cause your layers to delaminate.

Print tools

Print your downloaded tool in ABS*. Be sure to adjust your Slic3r temperature settings accordingly (Filament Settings > Temperature)

* Be sure to check the instructions for the tool for suggestions on materials, infill, etc.

* Please let me know if it was recommended to use PLA for your particular tool.

Parametric design

A parametric form is designed to accept input in the form of parameters or arguments. The parametric toolkit for OpenSCAD consists of:

  • Variables (a named value which can be used as a parameter) More info...
  • Modules (instructions to build forms which can be reused and accept parameters) More info...
  • Conditional statements (can be used to signal different versions or characteristics of forms from input parameters) More info...

Brief and helpful suggestions for making your design parametric: link

Let's look at a parametric wrench (link). Fixed file (link).

Homework

Parametric form (3 from 3)

Create a module which accepts three parameters, capable of producing at least three different, but related, forms.

  • Export .stl files of 3 different forms.
  • Document with a GitHub repository.

Printable tool research (due next week)

Find a tool which you think might be useful to you. Document your experience using the tool:

  • Try to use the tool as much as possible over the course of a week (minimum 3 uses); making notes or taking photos to document the experience.
  • Roughly 200 word (half page) document saved as a .pdf which describes your experience with the tool, including any suggestions you have for modifying it to better suit your needs.
  • Include at least 3 photos with documentation.
  • Bring tool to class next week.

Class 7: October 28th

Welcome back!

"For the real object is the functional object" Jean Baudrillard, from The System of Objects

Cuba's "Technological Disobedience"

Project 1 documentation due

Please submit your project documentation (images and video) directly to my laptop before the end of class. All code, exported .stl files, statements should be pushed to Github as well (by each member).

Project 1 peer review forms

Take a few minutes to fill out the peer review forms emailed to your MICA email address this morning. The details of the forms will be kept private, so please feel free to answer each question honestly.

DIY scanning

Using the Microsoft Kinect (or other PrimeSense depth cameras) and Skanect.

  • Skanect can be downloaded from here.
  • Skanect is available on dFab's lab computers for those without laptops (or laptops incapable of running the software).

Skanect

Skanect is a low-cost 3D scanning utility which uses data from the Kinect, or other PrimeSense depth cameras, to construct watertight 3D models suitable for 3D printing. This software relies on open source technologies, but is not open source itself. However, a free version of the software is available for non-commercial use.

Some limitations...

  • "Free" version exports at reduced resolution (limited to 5000 faces).
  • Noisy scans which require clean up (some can be done in Skanect, others in Netfabb)
  • Kinect has a minimum distance of about 2 feet
  • Fussy process (be patient!).

Netfabb

Demonstrate a couple of useful things which Netfabb can do, aside from repairing .stl files.

  • Cutting .stl objects.
  • Removing objects.
  • Moving, rotating, and scaling objects.

DIY scanning

Work with a partner to create a printed self-portrait of each of you.

  • Focus on the shoulders and up.
  • Rolling chairs are your friend...
  • Use Netfabb to resize and trim .stl file. (maximum of 40mm high!)
  • Print your portraits.

Discuss reading (excerpts from The System of Objects)

After lunch.

You will have 5 minutes to review the reading to pick out something which you find interesting and would like to discuss.

Homework

Printable tool research (due on Nov. 11th)

Find a tool which you think might be useful to you. Document your experience using the tool:

  • I recommend searching for your tool on Thingiverse.
  • Have tool file(s) in class next week for printing.
  • Try to use the tool as much as possible over the course of a week (minimum 3 uses); making notes or taking photos to document the experience.
  • Roughly 200 word (half page) document saved as a .pdf which describes your experience with the tool, including any suggestions you have for modifying it to better suit your needs.
  • Include at least 3 photos with documentation.

Manipulate your self portrait .stl with OpenSCAD

Use a combination of import() and for(){} to manipulate your self portrait.

  • import() function (info)
  • for(){} loops (info)
  • When imported, an .stl file can be manipulated like any other form (including intersect() and difference()).
  • IMPORTANT: The .stl file must be in the same folder as your OpenSCAD file.
  • Be sure to document on GitHub.

Class 5: October 14th

Project presentations

Today, we'll take a look at the collective fruits of our labor. Let's focus on providing thoughtful and constructive feedback for everyone. I would like for this discussion to be led by you not me.

A little structure...

For each group: First, we (the audience) provide feedback or ask questions based on observation. Then, you (the presenters) can talk a bit about what you were trying to accomplish. Finally, back and forth between all of us.

Remaining time

If you haven't already, 2 homework repositories on GitHub (which were due weeks ago...). Follow the structure laid out in Sept. 23rd homework for credit.

If you need some help with GitHub, please let me know.

Fall Break

Take a break

Take a well-deserved break from school. Forget about your responsibilities here while you can... enjoy the changing of the seasons...

After Fall Break

Project Documentation

I need the following from each group:

  • 1 high quality, edited image (minimum) of the connected forms plus an additional image of each individual form. Neutral backdrop.
  • 1 brief, edited video* of your work if there is an interactive component. 1-3 minutes. No music please.
  • (* A series of 5-6 high quality, edited photographs documenting the interaction can be substituted for a video)
  • Files (excluding video/series of images) uploaded to all members' GitHub account using the repository structure established for classwork (src, exported, readme, license, images)
  • In addition to the usual GitHub stuff, each repository should also contain a brief (roughly 200 word) pdf describing your project (goals, choices made, outcome, etc.)

Read this (we'll discuss in class on Oct. 28th

  • The System of Objects (excerpts from Structures of Interior Design and Structures of Atmosphere) by Jean Baudrillard (link)

Class 5: October 7th

GitHub usernames

Since email didn't seem to work out this past weekend, I would like everyone to write their GitHub username on the piece of paper which I'll be passing around. Do this first.

Open Studio

You have the entire period to work on your project. If the printers are in use and you would like to leave and try again later, please let me know. I'll ask you to show me the exported .stl or .scad file first.

I will be around to provide assistance as needed. Please let me know if you need any help.

New printer

If I can get the electronics installed this morning, we'll have one extra printer to work with today. I'm still calibrating, so YMMV...

The Slic3r config file (Blue i3) has been added to the sidebar of this page.

Homework

Project is due next week

Complete project. If you still have printing to do after class today, it is your responsibility to make time to visit the lab. Please take note of the lab's hours and/or talk to Andy regarding options.

Two important things:

  • Do not wait until the last minute to print. (This will not be an acceptable excuse next week for incomplete work.)
  • The dFab lab is not a turnkey fabrication service (you drop it off, they do the work to ensure that you have a print to pick up). You must monitor your own prints.

Class 4: September 30th

Craft

The Oyster's Our World by Susan Collis

114L by Henrik Menné

75P by Henrik Menné

5T by Henrik Menné

OpenSCAD

Any questions about creating modules?

Something new!

Using Adobe Illustrator to create an extrudable shape.

  • Download this Adobe Illustrator script (here).
  • Create your vector in Illustrator.
  • Move path(s) to 0,0 on the artboard to get a decent reference point.
  • Organic shapes should be simplified using Object > Path > Add Anchor Points and Object > Path > Simplify...
  • Select path(s) & run script using File > Scripts > Other Script... (then choose paths_toscad.jsx
  • Open the file in OpenSCAD.
  • This is supposed to use 1 point to 1 mm, however that was not the case in my tests.Use resize in OpenSCAD to scale things properly.

Regarding the RepRaps

Due to overwhelming demand, the printers will be now be moved into BR217 during the week. However...

  • I need two volunteers to meet me at BR217 before class (no later than 8:45) each week.
  • I need two volunteers to help me return the printers to BR217 after each class.
  • If there are no volunteers, the printers will stay in the dFab lab.
Also...

If you would like to use the printers in BR217, you must first demonstrate the complete operation (checking endstops, loading filament, operating Printrun, and removing filament). This can either be done today or next week. To reiterate, You only have permission to use the printers unsupervised if you can demonstrate that you know what you are doing. You are still welcome to use the printers under supervision in the dFab lab...

Test fitting

Use the digital calipers to create a form which fits onto your found object. Keep the printed form small and iterate until you have a good fit. You may need to use sandpaper or an exacto knife to help reshape the form; this is normal. :)

Homework

GitHub

Email me your GitHub username before next week.

Project

Begin working on the design of your form. If you've demonstrated that you are capable of operating the RepRaps in the lab, feel free to start printing. If you haven't, you can still print in the dFab lab using one of their printers.

In addition, I'd like one member of your group to email me a paragraph briefly describing your project plans.

Class 3: September 23rd

Hello again!

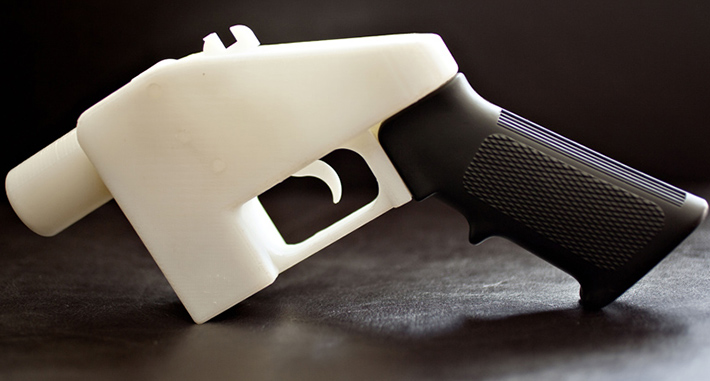
Cody Wilson's Liberator now part of the permanent collection of the V & A Museum in London.

3D Printed Guns documentary by VICE

Discuss Medium by Malcolm McCullough

You will have 5 minutes to review the reading and pick out something which you find interesting and would like to discuss.

Review OpenSCAD 2

Any questions about...

  • minkowski
  • hull
  • scale
  • resize
  • ?

GitHub Introduction

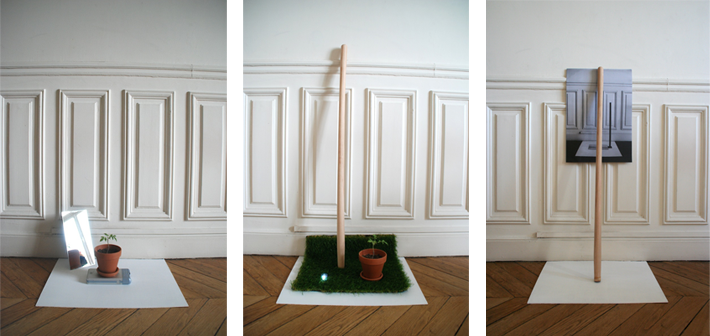
1962 by Raphael Bastide (GitHub repository)

  • So, what is GitHub?
  • Why should you care? (as artists/designers/people who like to share who are working with code)
  • Repositories (What are they?, creating, forking, cloning)
  • Simple workflow (work, commit, work, ...)
  • Branches (how to create, how to merge)

Slic3r (part 3)

  • Experimenting with infill.
  • Shells and fill.

RepRap Operation (part 3)

Changing filament:

  • Heat up hotend.
  • Loosen extruder idler bolts.
  • Pull out filament.
  • Insert new filament.
  • Tighten idler bolts.
  • Extrude plastic until the stream changes color.

Let's print some stuff!

Print your objects from this weekend, either individually or with a partner (if your objects are small enough to fit on the same plate). Experiment with infill and shells to decrease print time. If you are unable to print today, you will have to visit the dFab lab before next week to finish.

Project 1: Conversation (Due Oct. 14th)

Don Norman on affordances

This project is to be completed by 2 people (groups of 3 will be okay if there are enough people for everyone).

For the first project, I would like you to create a set of objects (1 per person in your group) which are somehow connected by a non-printed found object. Use the found object's pre-existing affordances to create or highlight a relationship between the printed parts. The dimensions of your printed objects will be determnined by the properties of your found object.

Let's pick partners today (maybe right now?) Let me know when you've formed a group.

Schedule:

  • Sept. 30th: Using digital calipers (bring your object), test printing
  • Oct. 7th: Printing session.
  • Oct. 14th: Project presentations

Homework

OpenSCAD

  • Modules in OpenSCAD (here)

GitHub

Create two repositories which include the following:

  • A source folder (named src or source) which contains your .scad file(s).
  • An export folder (named dist, stl, or exported) which contains your repaired .stl file(s).
  • An images folder (named img or images) which contains at least one edited image of your printed object.
  • A file named README.md which describes the assignment or objects.
  • An open source license of your choice (Probably MIT or GPL, but refer to choosealicense.com for assistance.)

Project

Brainstorm with partner and...

  • Search for potential interface objects (bring to class next week).
  • Create sketches on paper of possible forms to connect with the found object.

Class 2: September 16th

Welcome back!

Free Universal Connector Kit by F.A.T. Lab

Open Source* Toolchain (part 2)

Today, we'll be discussing these two components of our 3D printing toolchain:

  • OpenSCAD
  • NetFabb (*Not open source, but free!)

Review OpenSCAD Basics

Any questions about OpenSCAD? (Polyhedrons— yeah, I know... let's ignore them for now!)

  • Basic forms (cube, sphere, cylinder)
  • Transformations (scale, color, rotate, translate)
  • Combining forms (difference, intersection, union)
  • Compiling and rendering
  • Exporting .stl file

Netfabb Basic

Netfabb Basic is a free program which can be used to verify and repair .stl files. You will need to use this if Slic3r complains about a hole in your .stl file.

  • Repairing files
  • Exporting repaired .stl files
  • Instructions here.

Slic3r (part 2)

  • Multiple objects on the same plate.
  • Brims and support material.

Prusa i3 configuration file for Slic3r

This is the config file for the printer which I brought in to class today (link). You're free to use it, just don't break it! ;)

Let's print some stuff!

If you were in the last groups to print last week, then you are first to print today.

Print with a partner. Please plate both objects together in Slic3r and then generate g-code.

If you are really not interested in printing the form you made with OpenSCAD over the weekend, you have two choices:

  • Make another form!
  • Print out one of the .stl files from the Free Universal Connector Kit

Remember to "kick the tires"

Before you home the printer, you must inspect the printer. EVERY TIME!

  • These printers have 3 endstops (switches). Know where they are.
  • Move X and Y axis until you hear click of the switches. You will be heading oward the front left corner of the bed.
  • Look at Z endstop. Does it look like it lines up with the x-carriage above it? Make sure it does.
  • Put fingertip on the endstop and click the Home Z button in Printrun. Still look good? Hit home button again.
  • Ideal spacing between nozzle and the glass bed is just enough space to fit a piece of paper under. Adjust endstop until it feels right.
  • Test other areas on the bed by tunring off motors in Printrun and manually moving X and Y. Use corner levelers if it is way off.
  • Clean off any old residue with a scraper. Clean dust and grease with vinegar and paper towel. Clean bed!
  • EVERY TIME!

Homework

Do this stuff

  • OpenSCAD tutorial 2 [ignore multmatrix] (here)
  • Begin working on a small form (less than 6cm in its biggest direction). Bring .scad file to class next week. You will have time to work on your forms in class, but printing priority goes to those with finished models.

GitHub

Finish reading/read this stuff (we'll discuss it next week)

  • What Exactly is GitHub Anyway? (link)
  • Medium from Abstracting Craft: The Practiced Digital Hand, by Malcolm McCullough (link)

Class 1: September 9th

Welcome!

  • Introduction to class/syllabus review.
  • Open Source 3D Fab entrance survey.

Start making!

David Kelley, founder of IDEO

Cars!

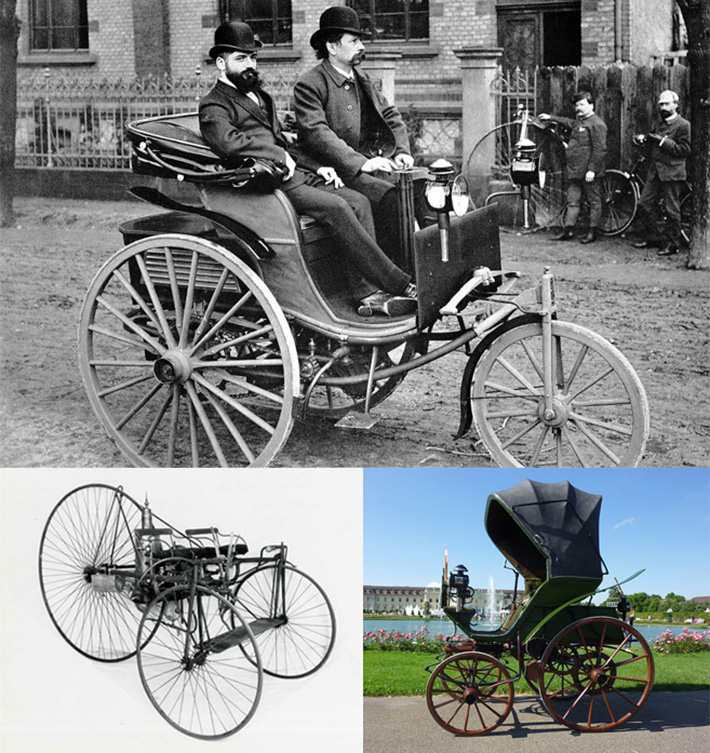
Early cars circa late 1900's

Hot rods, 1930's - 1960's

Next industrial revolution?

Maker movement

Fabrication on demand/skill sharing

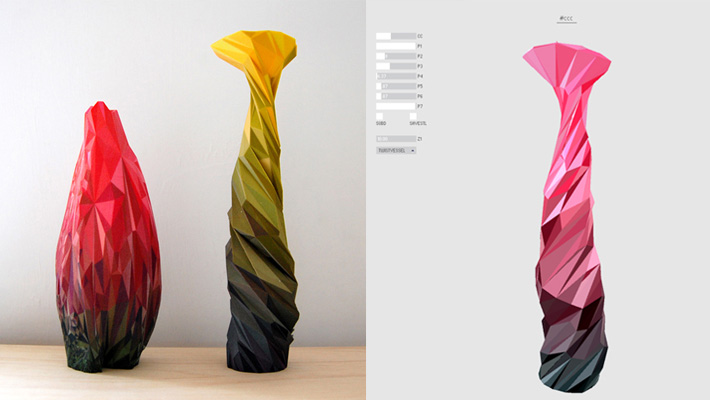
Digital Natives by Matthew Plummer Fernandez

tSet(); by Matthew Plummer Fernandez

Thread Wrapping Machine by Anton Alvarez

Mataerial by Petr Novikov & Sasa Jokic

RepRap (Replicating Rapid Prototyper)

Adrian Bowyer, founder of the RepPrap Project

RepRap Family Tree

Full list

Some notable/interesting family members

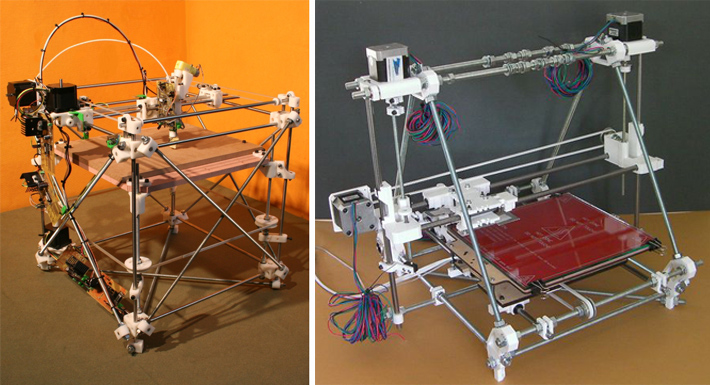
RepRap Darwin & Prusa Mendel

Rostock & Kossel Mini (Delta)

RepRap Morgan & Simpson

MilkRap?

Let's print some stuff!

Before we do some printing, we'll need something to print (oh yeah!). Choose one of the following and download the .stl files

  • Resistor lead former (link)

Open Source Toolchain (part 1)

Please install this software on your laptop:

  • Slic3r
  • Printrun (aka Pronterface)
  • Slic3r configuration files for IA Dept. RepRaps (link)

Slic3r

  • Slices an .stl file into a continuous toolpath, encoded in a language the printer can interpret (g-code)
  • Setting up configuration file to work with department printers. Be sure to save the configuration for all 3 settings!
  • Exploring the settings.
  • Basic operation.
  • Exporting g-code.

Printrun

  • Communicates with/controls the printer.
  • Connecting to printer.
  • Loading file.
  • Setting hotend and bed temperatures. Watching temperature.
  • Homing the printer ("kick tires" first).

"Kicking the tires"

Before you home the printer, you must inspect the printer. EVERY TIME!

  • These printers have 3 endstops (switches). Know where they are.
  • Move X and Y axis until you hear click of the switches. You will be heading oward the front left corner of the bed.
  • Look at Z endstop. Does it look like it lines up with the x-carriage above it? Make sure it does.
  • Put fingertip on the endstop and click the Home Z button in Printrun. Still look good? Hit home button again.
  • Ideal spacing between nozzle and the glass bed is just enough space to fit a piece of paper under. Adjust endstop until it feels right.
  • Test other areas on the bed by tunring off motors in Printrun and manually moving X and Y. Use corner levelers if it is way off.
  • Clean off any old residue with a scraper. Clean dust and grease with vinegar and paper towel. Clean bed!
  • EVERY TIME!

First Prints!

  • Extrude some PLA to get things going. Hit the Extrude button in Printrun once to extrude 5mm.
  • When everything is loaded, ready, and inspected, press the Print button.
  • Make sure to stay close to the printer in case there is a problem. Check on it periodically.
  • Pause the print if there is a problem.
  • Turn off heat, scrape, and restart if you want to start over.
  • In case of emergency, pull the POWER CABLE not the USB CABLE!
  • Estimated time to print at bottom.
  • When finished, the hotend and bed will turn off. When cool, you'll hear your parts crack off. Don't be impatient.

Homework

Order/buy 3mm PLA filament (tonight or tomorrow!).

Make sure to buy:

  • PLA
  • 3mm diameter
  • At least 1 lb. (buy more if you like!)

These vendors sell good quality stuff (There are many more online, but the quality varies. THIS KIND OF THING WILL CAUSE YOU/US HEADACHES):

Install this stuff on your laptop

Read this stuff (we'll discuss it in 2 weeks)

  • Medium from Abstracting Craft: The Practiced Digital Hand, by Malcolm McCullough (link)

Do this stuff

  • OpenSCAD introduction tutorial (here)
  • Begin working on a small form (less than 4cm in its biggest direction). Try starting with something that has a flat bottom and minimal overhang. Bring .scad file to class next week